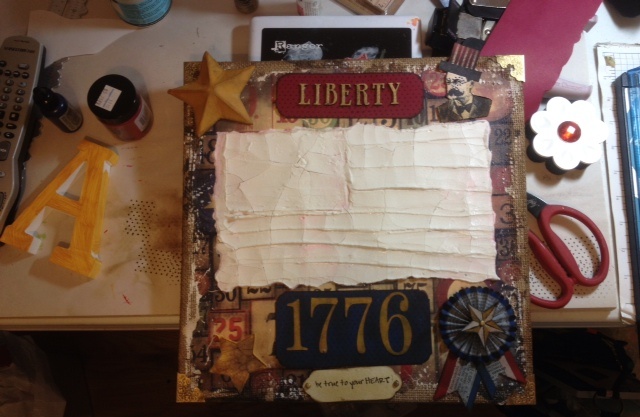
Today we are releasing the our Mixed Media projects from our Designer, Carol Becker. These projects along with the other projects are hanging up on the wall to the to the left of the register. Please feel free to ask any of our Staff for information on the products that were used on these projects.
Mixed Media Projects by Carol Becker
Wild West
Supplies:
Materials provided:
Stampers Anonymous Wild West Stamp Set
Tim Holtz Stars Stencil
Golden Clear Granular Gel
Kaiser Kraft Wings
Kaiser Craft Angel Shape
Golden Nugget
Ranger's Foil paper
Burlap 5X7 Panel
Oh, what to make, what to make…..Clear Granular Gel? WTH is this stuff? Off to You Tube I go to try to figure out what can be done with this goo. Pretty interesting. It’s made up of little acrylic beads in a medium that dries clear and can be mixed with acrylic paint. I tested it out with and without paint. Nice.
For my first project, I decided to play with the Wild West Stamp Set. I stamped all the stamps on Tim’s new watercolor distress paper. Still no idea what I am going to do. I started coloring with distress markers, mixed with a little water and applied with a paintbrush. For the cowboy's hair, I mixed the clear granular gel with Tim's Yellow Distress Paint. Fussy cut everything, including "Wild West". Letters painted with Yellow Distress Marker, mixed with a tiny bit of water and painted on the letters with a paintbrush. After drying, use a little Golden Luminescent Paint. Distress all with Vintage Photo Ink, Walnut Stain and Black Soot Ink.
Background for letters: On watercolor paper - Rusty Hinge Distress Stain, Tim's Wood Grain Background Stamp stamped with Walnut Ink. Using glossy accents, adhere letters.
Pistols: Paint grunge paper with brushed pewter distress paint, dry. Stamp pistol on grunge. Now for mirror image: use a mirror image stamp, apply to painted grunge paper. If you do not have a mirror image stamp, stamp image on wax paper and then apply to grunge - thank you tube again! Let dry, paint handles with pearl perfect pearls.
Burlap panel: Distressed with Vintage Photo and Snow White Distress Paint. Cut foil paper a little smaller than panel and use corner chopper on corners. Using alcohol ink applicator, apply Sailboat Blue Alcohol Ink, after drying, stamp Paisley Stamp with Black Archival Ink. Distress edges and ink with Walnut and Black Soot Inks.
Using yellow jute again, formed a lasso and attached to cowboys hand using hot glue.
Star border: embossed and distressed with vintage phone ink.
It took me several days before I would glue any pieces down. I had to keep playing with it, moving the pieces around, changing the orientation, but this is the final piece! Hope you all like it!


2nd Mixed Media Project by Carol Becker
Patriotic Angel
I coated the Angel with Matte Medium, then base coated with White Distress Paint. Using artist tape, I masked off most of the angels skirt and painted with Blue Distress Paint.
On specialty stamping paper I used Fired Brick Ink on Tim's Notepad Stamp for my stripes. I filed in stripes with Red Distress Ink, mixed on mat and applied with paintbrush. Trimmed to fit and adhered using matte medium. After drying, I toned down the white paper with Antique Linen Paint. Sand edges and distress with ink.
Hair: Yellow Jute from SP. To make curls: Jute wrapped around a paintbrush and dipped into a solution of 1/2 White Glue and 1/2 water. Dry on paper towels.
Skirt: After blue paint dries using star stencil, apply White Distress Paint with a stencil brush. Do not lift stencil, using a spatula, apply clear granular gel to stencil as if you are icing a cake. Lift carefully, let dry.
Face: Mix Red and White Distress Paint to make pink. On specialty stamping paper paint a section with Yellow Distress Paint, stamp Lady Liberty with Black Archival Ink. Distress with Black Distress Iink. Adhere to back of head with matte medium and trim. If hair is dry, adhere with glue gun and trim.
Wings: Paint with White Distress Paint. When dry, using a stencil brush, pounce on Clear Granular Gel. Adhere to body using Glossy Accents.
Tone the whites down with Antique Linen, if desired. Distress edges with Walnut Ink and Black Soot Ink.
Pearl Pen for necklace. Trim with Tim's lace on bottom of skirt , distress with Walnut or Vintage Photo distress stain.
Finishing touch: Yellow ribbon tied around Angels waist.